
Back in the days, using machine learning capabilities was only possible over the cloud as it required a lot of compute power, high-end hardware etc… But mobile devices nowadays have become much more powerful and our Algorithms more efficient. All this has led to on-device machine learning a possibility and not just a science fiction theory.
On device machine learning is being used everywhere nowadays, such as:
- Smart Assistants: Such as Cortana, Siri, Google Assistant. Google assistant received a major update in this year’s Google IO and a major area of focus was to increase on-device machine learning capabilities.
- Snapchat Filters: Snapchat uses Machine Learning to detect human faces and apply 3-D filters like glasses, hats, dog filters etc.
- Smart Reply: Smart reply is an on-device capability included in chat applications such as whatsapp etc… with the aim of providing a pre-built message template to send in response to a message.
- Google Lens: Although in it’s nascent stage, google lens uses machine learning models to identify and label objects.
And the list can go on and on. So, in this post we’ll take a look at how to use machine learning capabilities in our android apps and make them smarter.
By 2022, 80 per cent of smartphones shipped will have on-device AI capabilities, up from 10 per cent in 2017 Share on XWhat is Firebase ML Kit?
Firebase ML Kit is a mobile SDK that makes it easier for mobile developers to include machine learning capabilities in their applications. It consists of the following pre-built APIs:
- Text Recognition: To recognize and extract text from images.
- Face Detection: To detect faces and facial landmarks along with contours.
- Object Detection and Tracking: To detect, track and classify objects in camera and static images.
- Image Labelling: Identify objects, locations, activities, animal species, and much more.
- Barcode scanning: Scan and process barcodes.
- Landmark recognition: Identifying popular landmarks in an image.
- Language ID: To detect the language of the text.
- On-Device Translation: Translating text from one language to another.
- Smart Reply: Generating textual replies based on previous messages.
Apart from that one can use their custom image classification machine learning models (.tflite models) using AutoML.
ML Kit is basically a wrapper over the complexities of including and using machine learning capabilities in your mobile app.
What will we be creating?
We’ll be using Face Detection capability of ML Kit to detect faces in an image. We’ll be capturing the image via our camera and running an inference over it.
To use ML Kit, it is necessary to have a Firebase account. If you don’t already have one, go ahead and create an account: https://firebase.google.com
Creating a project on Firebase
Once you’ve created an account on firebase, go to https://console.firebase.google.com and click on add project.
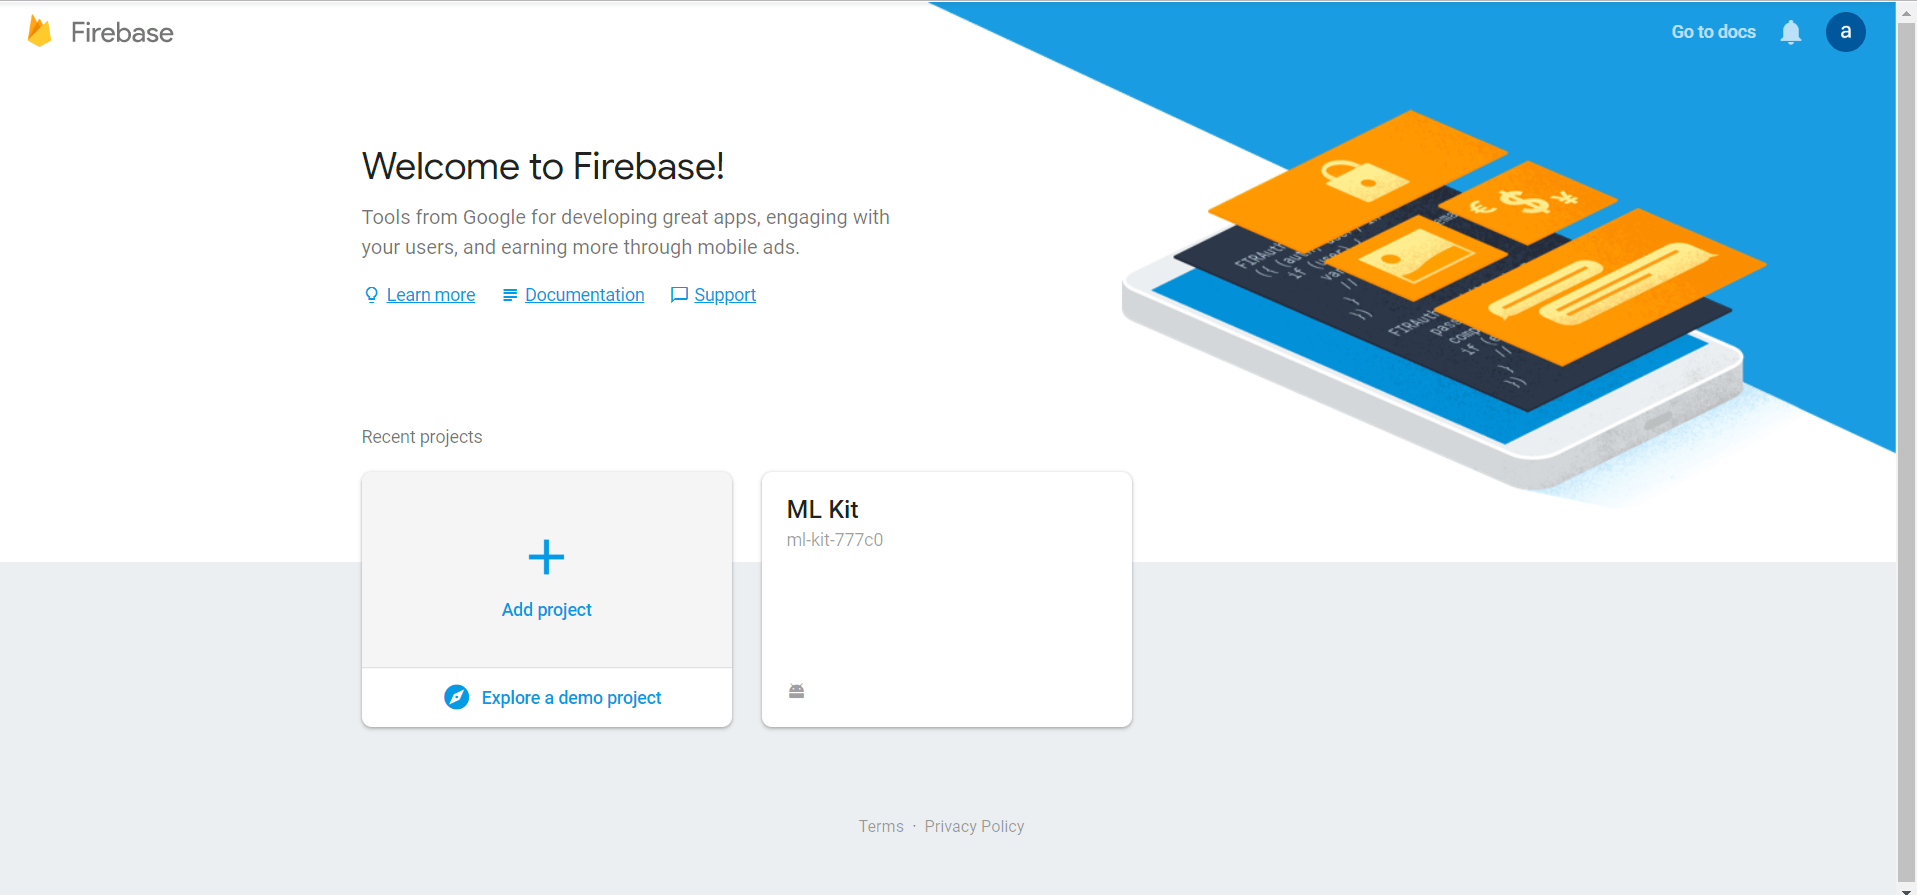
Give your project a name and click on “Create”. It can take a few seconds before your project is ready. Next, we’ll go ahead and add an android app to our project.
Adding an app
Open android studio and start a new project with an empty activity.
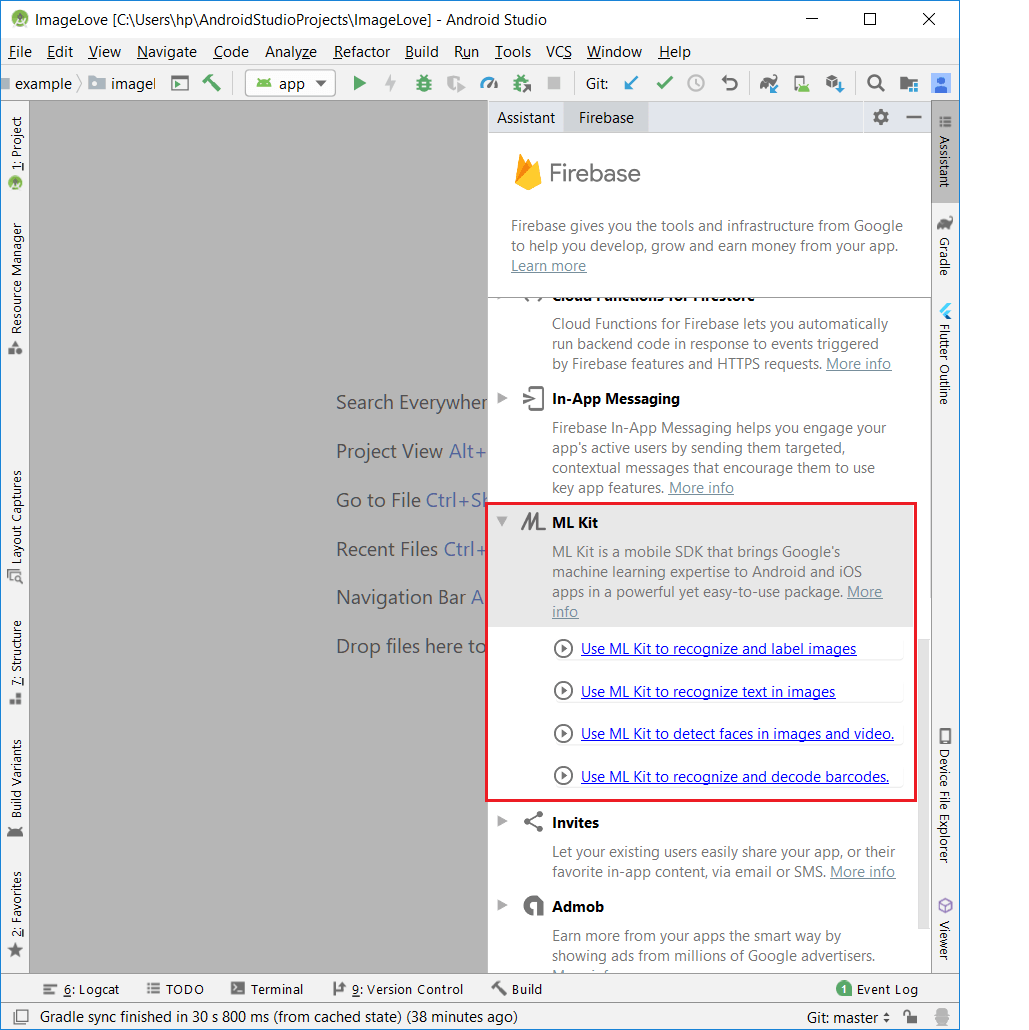
Then click on Tools -> Firebase. This will open the firebase assistant on the right hand panel. From the list of options, select ML Kit and click on “Use ML Kit to detect faces in images and video”.
It would prompt you to connect your studio to an app in firebase. Click on connect and sign in to your firebase project.
Once you permit Android Studio to access your firebase project, you’ll be prompted to select a project. Choose the one your created in the previous step.
After that you’ll need to add ML Kit to your app which is a one click setup from assistant. Once it’s done adding dependencies, your ready to go ahead and create your application.
Configuring AndroidManifest.xml
You’ll need to modify your androidmanifest.xml to enable offline machine learning in your android app.
Add the following meta-tag in directly below your application tag.
<meta-data
        android:name="com.google.firebase.ml.vision.DEPENDENCIES"
        android:value="face"/>
Also, we’ll be adding a camera feature in our application, hence add a permission tag in manifest.
<uses-permission android:name="android.permission.CAMERA"/>
Adding a camera to our application
To add the camera to our application we’ll be using WonderKiln’s CameraKit. To use camerakit, add the following dependencies in you app level build.gradle file:
implementation 'com.camerakit:camerakit:1.0.0-beta3.11'
implementation 'com.camerakit:jpegkit:0.1.0'
implementation 'org.jetbrains.kotlin:kotlin-stdlib-jdk7:1.3.31'
implementation 'org.jetbrains.kotlinx:kotlinx-coroutines-android:1.0.0'
Note: The kotlin dependencies are to be included if you use kotlin in your android app.
Sync the project and your dependencies will be downloaded.
Next, we’ll be adding a CameraKitView in our activity_main.xml layout file. Add the following code in your layout file:
<com.camerakit.CameraKitView
        android:layout_above="@id/btn_detect"
        android:layout_width="match_parent"
        android:id="@+id/camera_view"
        android:layout_height="match_parent"
        android:adjustViewBounds="true"
        android:keepScreenOn="true"
        app:camera_flash="auto"
        app:camera_facing="back"
        app:camera_focus="continuous"
        app:camera_permissions="camera">

</com.camerakit.CameraKitView>
Also add a button to the bottom of the screen to capture images.
<Button android:layout_width="match_parent" android:layout_height="wrap_content"
        android:layout_alignParentBottom="true"
        android:layout_centerHorizontal="true"
        android:id="@+id/btn_detect"
        android:text="Detect"/>
Configuring the camera
We’ll be initializing the camera in our MainActivity.kt file. For this, we’ll override some lifecycle methods and within these methods, we’ll call the lifecycle methods for our camera:
override fun onResume() {
    super.onResume()
    camera_view.onResume()
}

override fun onPause() {
    super.onPause()
    camera_view.onPause()
}

override fun onStart() {
    super.onStart()
    camera_view.onStart()
}

override fun onStop() {
    super.onStop()
    camera_view.onStop()
}
Starting from Android M, we need to ask for runtime permissions. This is handled by WonderKiln’s CameraKit library itself. Just override the following method:
override fun onRequestPermissionsResult(requestCode: Int, permissions: Array<String>, grantResults: IntArray) {
    super.onRequestPermissionsResult(requestCode, permissions, grantResults)
    camera_view.onRequestPermissionsResult(requestCode, permissions, grantResults)
}
Capturing an Image
We’ll capture an image on button press and send the image to our detector. Then we’ll be applying the machine learning model to the image to detect faces.
Set an onclicklistener to the button and inside the onClick function, call the captureImage function of Camera View.
btn_detect.setOnClickListener {
            camera_view.captureImage { cameraKitView, byteArray ->

            }
        }
We’ll be decoding the byteArray into a bitmap and then scaling the bitmap to a reasonable size. Essentially, the size of our camera_view.
btn_detect.setOnClickListener {
            camera_view.captureImage { cameraKitView, byteArray ->
                camera_view.onStop()
                alertDialog.show()
                var bitmap = BitmapFactory.decodeByteArray(byteArray, 0, byteArray?.size ?: 0)
                bitmap = Bitmap.createScaledBitmap(bitmap, camera_view?.width ?: 0, camera_view?.height ?: 0, false)
                runDetector(bitmap)
            }
            graphic_overlay.clear()
        }
Now it’s time to finally run our detector over the bitmap. For this, we create a separate function runDetector().
Starting Detection
This is the meat of the application. We’ll be running a detector over our input image. First, create a FirebaseVisionImage from the captured bitmap.
val image = FirebaseVisionImage.fromBitmap(bitmap)
Then it’s time to add some options such as performanceMode, countourMode, landmarkMode etc…
val options = FirebaseVisionFaceDetectorOptions.Builder()
    .build()
Now, we’ll create our detector using these options.
val detector = FirebaseVision.getInstance()
    .getVisionFaceDetector(options)
Finally, it’s time to start detection. Using the detector, call the detectInImage function and pass in the image. We will get callbacks for success and failure.
This is how the runDetector function would look like:
private fun runDetector(bitmap: Bitmap) {
    val image = FirebaseVisionImage.fromBitmap(bitmap)
    val options = FirebaseVisionFaceDetectorOptions.Builder()
        .build()

    val detector = FirebaseVision.getInstance()
        .getVisionFaceDetector(options)

    detector.detectInImage(image)
        .addOnSuccessListener { faces ->
            processFaceResult(faces)

        }.addOnFailureListener {
            it.printStackTrace()
        }

}
Creating the bounding box
In order to create a bounding box on the detected faces, we’ll need to create two views. First is an overlay transparent view on which we will draw the box. Next is the actual box.
Here’s the GraphicOverlay.java file:
public class GraphicOverlay extends View {
    private final Object mLock = new Object();
    private int mPreviewWidth;
    private float mWidthScaleFactor = 1.0f;
    private int mPreviewHeight;
    private float mHeightScaleFactor = 1.0f;
    private int mFacing = CameraSource.CAMERA_FACING_BACK;
    private Set<Graphic> mGraphics = new HashSet<>();

    /**
     * Base class for a custom graphics object to be rendered within the graphic overlay.  Subclass
     * this and implement the {@link Graphic#draw(Canvas)} method to define the
     * graphics element.  Add instances to the overlay using {@link GraphicOverlay#add(Graphic)}.
     */
    public static abstract class Graphic {
        private GraphicOverlay mOverlay;

        public Graphic(GraphicOverlay overlay) {
            mOverlay = overlay;
        }

        /**
         * Draw the graphic on the supplied canvas.  Drawing should use the following methods to
         * convert to view coordinates for the graphics that are drawn:
         * <ol>
         * <li>{@link Graphic#scaleX(float)} and {@link Graphic#scaleY(float)} adjust the size of
         * the supplied value from the preview scale to the view scale.</li>
         * <li>{@link Graphic#translateX(float)} and {@link Graphic#translateY(float)} adjust the
         * coordinate from the preview's coordinate system to the view coordinate system.</li>
         * </ol>
         *
         * @param canvas drawing canvas
         */
        public abstract void draw(Canvas canvas);

        /**
         * Adjusts a horizontal value of the supplied value from the preview scale to the view
         * scale.
         */
        public float scaleX(float horizontal) {
            return horizontal * mOverlay.mWidthScaleFactor;
        }

        /**
         * Adjusts a vertical value of the supplied value from the preview scale to the view scale.
         */
        public float scaleY(float vertical) {
            return vertical * mOverlay.mHeightScaleFactor;
        }

        /**
         * Adjusts the x coordinate from the preview's coordinate system to the view coordinate
         * system.
         */
        public float translateX(float x) {
            if (mOverlay.mFacing == CameraSource.CAMERA_FACING_FRONT) {
                return mOverlay.getWidth() - scaleX(x);
            } else {
                return scaleX(x);
            }
        }

        /**
         * Adjusts the y coordinate from the preview's coordinate system to the view coordinate
         * system.
         */
        public float translateY(float y) {
            return scaleY(y);
        }

        public void postInvalidate() {
            mOverlay.postInvalidate();
        }
    }

    public GraphicOverlay(Context context, AttributeSet attrs) {
        super(context, attrs);
    }

    /**
     * Removes all graphics from the overlay.
     */
    public void clear() {
        synchronized (mLock) {
            mGraphics.clear();
        }
        postInvalidate();
    }

    /**
     * Adds a graphic to the overlay.
     */
    public void add(Graphic graphic) {
        synchronized (mLock) {
            mGraphics.add(graphic);
        }
        postInvalidate();
    }

    /**
     * Removes a graphic from the overlay.
     */
    public void remove(Graphic graphic) {
        synchronized (mLock) {
            mGraphics.remove(graphic);
        }
        postInvalidate();
    }

    /**
     * Sets the camera attributes for size and facing direction, which informs how to transform
     * image coordinates later.
     */
    public void setCameraInfo(int previewWidth, int previewHeight, int facing) {
        synchronized (mLock) {
            mPreviewWidth = previewWidth;
            mPreviewHeight = previewHeight;
            mFacing = facing;
        }
        postInvalidate();
    }

    /**
     * Draws the overlay with its associated graphic objects.
     */
    @Override
    protected void onDraw(Canvas canvas) {
        super.onDraw(canvas);

        synchronized (mLock) {
            if ((mPreviewWidth != 0) && (mPreviewHeight != 0)) {
                mWidthScaleFactor = (float) canvas.getWidth() / (float) mPreviewWidth;
                mHeightScaleFactor = (float) canvas.getHeight() / (float) mPreviewHeight;
            }

            for (Graphic graphic : mGraphics) {
                graphic.draw(canvas);
            }
        }
    }
}
Here is the actual rectangle box:
public class RectOverlay extends GraphicOverlay.Graphic {

    private int RECT_COLOR = Color.RED;
    private float strokeWidth = 4.0f;
    private Paint rectPaint;
    private Rect rect;
    private GraphicOverlay graphicOverlay;

    public RectOverlay(GraphicOverlay graphicOverlay, Rect rect) {
        super(graphicOverlay);

        this.graphicOverlay = graphicOverlay;
        this.rect = rect;
        rectPaint = new Paint();
        rectPaint.setColor(RECT_COLOR);
        rectPaint.setStyle(Paint.Style.STROKE);
        rectPaint.setStrokeWidth(strokeWidth);
        postInvalidate();
    }


    @Override
    public void draw(Canvas canvas) {
        RectF rectF = new RectF(rect);
        rectF.left = translateX(rectF.left);
        rectF.right = translateX(rectF.right);
        rectF.top = translateY(rectF.top);
        rectF.bottom = translateY(rectF.bottom);
        canvas.drawRect(rectF, rectPaint);
    }
}
It’s time to add this graphicOverlay view in our activity_main.xml layout file:
<com.example.imagelove.GraphicOverlay
        android:id="@+id/graphic_overlay"
        android:layout_width="match_parent" android:layout_height="match_parent"/>
This is how our activity_main.xml file finally looks like:
<?xml version="1.0" encoding="utf-8"?>
<RelativeLayout
        xmlns:android="http://schemas.android.com/apk/res/android"
        xmlns:tools="http://schemas.android.com/tools"
        xmlns:app="http://schemas.android.com/apk/res-auto"
        android:layout_width="match_parent" android:layout_height="match_parent"
        tools:context=".MainActivity">

    <Button android:layout_width="match_parent" android:layout_height="wrap_content"
            android:layout_alignParentBottom="true"
            android:layout_centerHorizontal="true"
            android:id="@+id/btn_detect"
            android:text="Detect"/>

    <com.camerakit.CameraKitView
            android:layout_above="@id/btn_detect"
            android:layout_width="match_parent"
            android:id="@+id/camera_view"
            android:layout_height="match_parent"
            android:adjustViewBounds="true"
            android:keepScreenOn="true"
            app:camera_flash="auto"
            app:camera_facing="back"
            app:camera_focus="continuous"
            app:camera_permissions="camera">

    </com.camerakit.CameraKitView>

    <com.example.imagelove.GraphicOverlay
            android:id="@+id/graphic_overlay"
            android:layout_width="match_parent" android:layout_height="match_parent"/>

</RelativeLayout>
Now it’s time to add the bounding box around the detected faces. Using the detector, we receive the faces in our processFaceResult() function.
Iterate over all the faces and add a box over each face as such:
private fun processFaceResult(faces: MutableList<FirebaseVisionFace>) {
    faces.forEach {
        val bounds = it.boundingBox
        val rectOverLay = RectOverlay(graphic_overlay, bounds)
        graphic_overlay.add(rectOverLay)
    }
    alertDialog.dismiss()
}
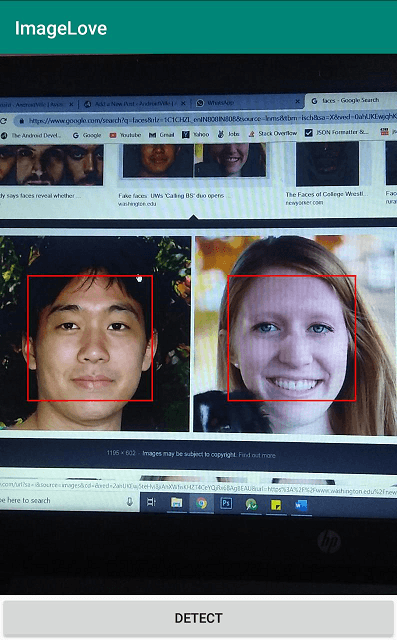
Conclusion
This is how our application looks like at the end.
You can download the source code for this application on github: https://github.com/Ayusch/mlkit-facedetection.git
Play around with it and let me know what innovative ideas were you able to come up using machine learning in your android applications.
*Important*: Join the AndroidVille SLACK workspace for mobile developers where people share their learnings about everything latest in Tech, especially in Android Development, RxJava, Kotlin, Flutter, and mobile development in general.
Click on this link to join the workspace. It’s absolutely free!
Like what you read? Don’t forget to share this post on Facebook, Whatsapp, and LinkedIn.
You can follow me on LinkedIn, Quora, Twitter, and Instagram where I answer questions related to Mobile Development, especially Android and Flutter.
If you want to stay updated with all the latest articles, subscribe to the weekly newsletter by entering your email address in the form on the top right section of this page.