
Logging is one of the most used utility in android framework. It is really helpful in debugging your code when debugging by break-point just wont work. It is generally a good practice to place Log statements in your code as it helps you keep a track of flow control in your application. Similarly, it is not a recommended to have log statements in your release ready code, since those log statements can be read by anyone who connects his phone to a PC. So, when releasing your application to the play store, it is recommended to remove all the log statements from your code.
But this can be a real pain. There are so many log statements all over your code and now you have to manually find each one and remove it from your code just for the release version.
Another problem with the default logging mechanism is that you need to pass the TAG, every time you write a log statement.
Wouldn’t it be wonderful if the log statements would automatically disable themselves when in production? Wouldn’t it be great if the Log statements automatically picked up the TAG/classname while logging and you could just focus on writing better code?
Well, problems such as these and many more are solved by a better logging library in android, called Timber (by Jake Wharton).
It is a light-weight, easy to use library which takes care of most of the maintenance you need to do while logging so that you can focus more on writing great code and less on the maintenance stuff.
Let’s go ahead and create a sample application to see how you can include Timber in your android application and make your logging life easier.
Getting Started
We will be creating a simple android application with 4 buttons. Each button would print out different priority log statement on the console.
Create a new project in Android and add a dependency for Timber in your app level build.gradle file. At the time of this writing, this is the latest dependency version for timber:
implementation 'com.jakewharton.timber:timber:4.7.1'
Initializing Timber
With the dependency downloaded, now it’s time to initialize the timber library. Best place to initialize timber is in the Application class which will be active during the entire lifetime of the application. So, let’s create a custom application class and initialize our Timber library in it:
class MainApplication : Application() {
    override fun onCreate() {
        super.onCreate()
        if(BuildConfig.DEBUG){
            Timber.plant(Timber.DebugTree())
        }
    }
}
Creating MainActivity
Let’s now create our MainActivity by adding 4 buttons and setting on click listeners to each of them. Here is my activity_main.xml file. I’m using ConstraintLayout as my root layout and including 4 buttons each for different logging levels.
<?xml version="1.0" encoding="utf-8"?>
<android.support.constraint.ConstraintLayout
        xmlns:android="http://schemas.android.com/apk/res/android"
        xmlns:tools="http://schemas.android.com/tools"
        xmlns:app="http://schemas.android.com/apk/res-auto"
        android:layout_width="match_parent"
        android:layout_height="match_parent"
        tools:context=".MainActivity">


    <Button
            android:text="Error Log"
            android:layout_width="wrap_content"
            android:layout_height="wrap_content"
            android:id="@+id/btn_error" app:layout_constraintStart_toStartOf="parent" android:layout_marginStart="8dp"
            app:layout_constraintEnd_toEndOf="parent" android:layout_marginEnd="8dp" android:layout_marginTop="108dp"
            app:layout_constraintTop_toTopOf="parent" app:layout_constraintHorizontal_bias="0.498"/>
    <Button
            android:text="Info Log"
            android:layout_width="wrap_content"
            android:layout_height="wrap_content"
            android:id="@+id/btn_info" android:layout_marginTop="64dp"
            app:layout_constraintTop_toBottomOf="@+id/btn_error" app:layout_constraintStart_toStartOf="parent"
            android:layout_marginStart="8dp" app:layout_constraintEnd_toEndOf="parent" android:layout_marginEnd="8dp"
            app:layout_constraintHorizontal_bias="0.498"/>
    <Button
            android:text="Debug Log"
            android:layout_width="wrap_content"
            android:layout_height="wrap_content"
            android:id="@+id/btn_debug" android:layout_marginTop="72dp"
            app:layout_constraintTop_toBottomOf="@+id/btn_info" app:layout_constraintStart_toStartOf="parent"
            android:layout_marginStart="8dp" app:layout_constraintEnd_toEndOf="parent" android:layout_marginEnd="8dp"
    />
    <Button
            android:text="Verbose Log"
            android:layout_width="wrap_content"
            android:layout_height="wrap_content"
            android:id="@+id/btn_verbose" android:layout_marginTop="68dp"
            app:layout_constraintTop_toBottomOf="@+id/btn_debug" app:layout_constraintStart_toStartOf="parent"
            android:layout_marginStart="8dp" app:layout_constraintEnd_toEndOf="parent" android:layout_marginEnd="8dp"
            android:layout_marginBottom="8dp"
            app:layout_constraintBottom_toBottomOf="parent" app:layout_constraintVertical_bias="0.061"/>
</android.support.constraint.ConstraintLayout>
Now it’s time to set click listeners to these buttons and print a log statement every time a button is clicked. I’m using kotlin’s synthetic bindings instead of regular findViewById calls or Butterknife. Here is my MainActivity.kt file:
class MainActivity : AppCompatActivity() {

    override fun onCreate(savedInstanceState: Bundle?) {
        super.onCreate(savedInstanceState)
        setContentView(R.layout.activity_main)

        btn_error.setOnClickListener {
            onClickedError()
        }

        btn_info.setOnClickListener {
            onInfoClicked()
        }

        btn_debug.setOnClickListener {
            onDebugClicked()
        }

        btn_verbose.setOnClickListener {
            onVerboseClicked()
        }
    }

    private fun onVerboseClicked() {
        Timber.v("On Verbose Clicked")
    }

    private fun onDebugClicked() {
        Timber.d("On Debug Clicked.")
    }

    private fun onInfoClicked() {
        Timber.i("On Info clicked.")
    }

    private fun onClickedError() {
        Timber.e("On Error Clicked.")
    }


}
Notice how we didn’t need to initialize any TAG variable in our class, Timber does it automatically for you.
Customizing Timber for Debug and Release
Now, this is where Timber really shines. What we’ve done till now was nothing great, just printing the log statements on button clicks. But as you know, logging in production is not a good idea, so now we will write code to disable the logs for production while keeping them enabled during debug mode.
We’ll write a if block to check if our app is in debug mode and enable logging for that, if not, then we want to initialize Timber using a custom tree.
Here’s the modified MainApplication.kt class:
class MainApplication : Application() {
    override fun onCreate() {
        super.onCreate()
        if (BuildConfig.DEBUG) {
            Timber.plant(object : Timber.DebugTree() {
                override fun createStackElementTag(element: StackTraceElement): String? {
                    return String.format(
                        "Class:%s: Line: %s, Method: %s",
                        super.createStackElementTag(element),
                        element.lineNumber,
                        element.methodName
                    )
                }
            })
        } else {
            Timber.plant(ReleaseTree())
        }
    }
}
As you can see, we’ve initialized timber using a custom ReleaseTree when in release mode. Now let’s go ahead and create our own release tree.
Creating a Custom Tree
Creating a release tree is fairly simple. Create a new Kotlin class and extend it from Timber.Tree. Implement all the abstract functions and you’re good to go.
Here’s my ReleaseTree.kt:
class ReleaseTree : @NotNull Timber.Tree() {
    override fun log(priority: Int, tag: String?, message: String, t: Throwable?) {
        if (priority == Log.ERROR || priority == Log.WARN){
            //SEND ERROR REPORTS TO YOUR Crashlytics.
        }
    }

}
As you can see, whenever there is an error, we can send the log to an online service such as Firebase CrashAnalytics or Crashlytics and not logging out on production.
Result
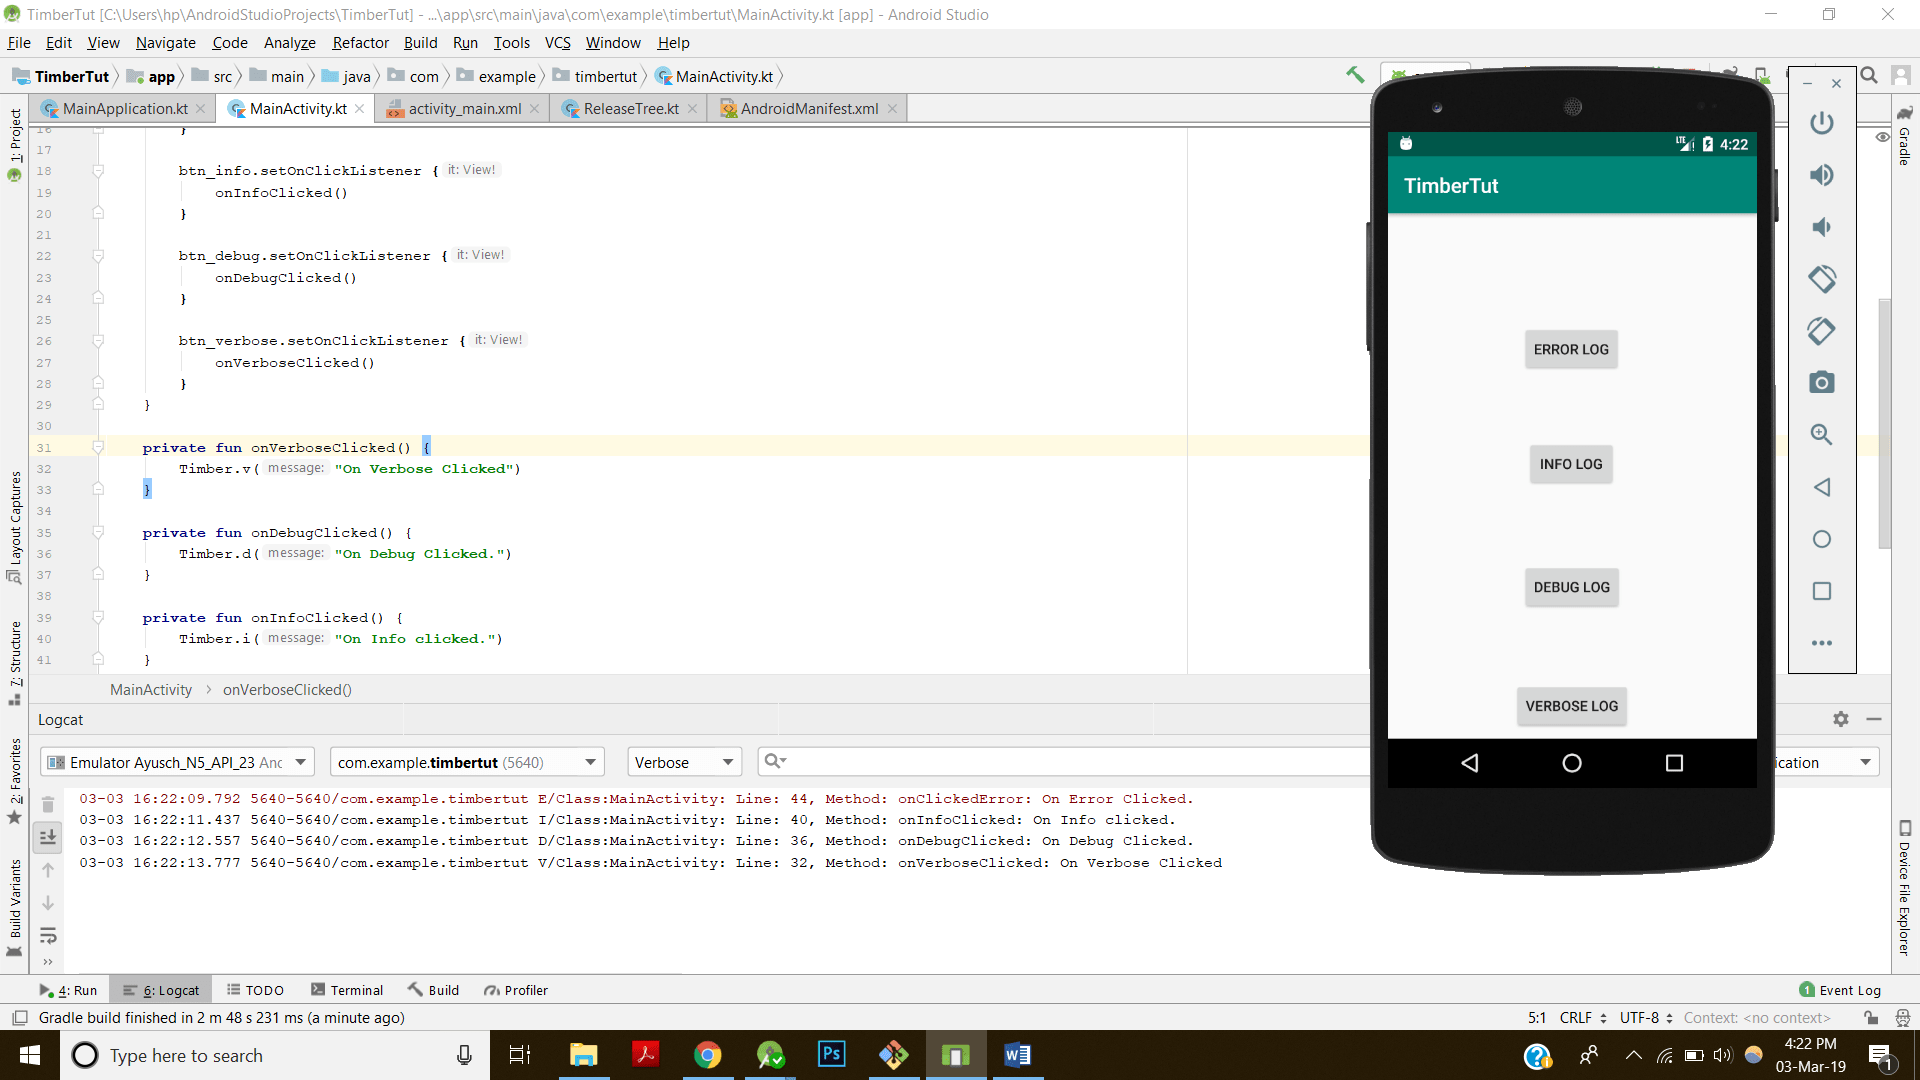
Benefits of using Timber vs Android Logging
Let’s look at some of the benefits of using Timber library instead of the default Log utility by android sdk.
- No need to worry about TAGS: Timber generates the TAGs automatically for you so you don’t have to worry about including a global TAG in every class.
- No need to manually remove Log statements: As already shown, it’s really easy to disable Logging for release apps. Hence, you no more have to go through your entire code and manually remove all the logs.
- Customized behavior on production: In production versions you don’t want to log, although you definitely want to log any crashes that might occur. You can implement this by using a custom debug tree (as shown above) which instead of logging to the logcat, sends the logs to your crashlytics service.
- Customized Meta-Data: You can include customized meta data with your log statements. For example: I’ve added class name, line number and method name from which the log statement is getting printedi n the implementation above. Having this data at your disposal can make debugging easier.
- Lightweight: Does’t not increase your app size/method count by much. Really lightweight library as it is just a wrapper over the already existing log utility.
Conclusion
For long I had ignored the use of log statements and printing out better logs, but as my code got bigger and problems got complex, I realized I needed to adopt better and more efficient debugging routines and hence, using Timber is one step in the right direction.
*Important*: I’ve created a SLACK workspace for mobile developers where we can share our learnings about everything latest in Tech, especially in Android Development, RxJava, Kotlin, Flutter, and overall mobile development in general.
Click on this link to join the slack workspace. It’s absolutely free!
Like what you read? Don’t forget to share this post on Facebook, Whatsapp, and LinkedIn.
You can follow me on LinkedIn, Quora, Twitter, and Instagram where I answer questions related to Mobile Development, especially Android and Flutter.
If you want to stay updated with all the latest articles, subscribe to the weekly newsletter by entering your email address in the form on the top right section of this page.