

In my previous article, I talked about what all points should you consider before diving into flutter app development. I also did a comparison of the two most popular cross-platform mobile app development technologies, Flutter vs React Native.
So, now that you have made up your mind and are ready to get started with Flutter, I am going to show you how you can setup your machine to get started with flutter development and run a simple hello world app.
Installing Flutter on Windows
System Requirements
Your system must fulfill the below mentioned minimum requirements:
- Operating System: Windows 7 SP1 or later
- Disk Space: 400 MB (This is for Flutter SDK only and not for your IDE)
- PowerShell 5.0 or later: This is the terminal equivalent of Windows. It comes default with windows 10.
- Git for Windows: To run git commands, you must have git setup on your machine. Here is a simple and easy tutorial on how to do that:
Download Flutter SDK
Now that your machine matches the minimum requirements, let’s begin with the actual setup:
- Download the latest Flutter SDK from https://www.flutter.io
- Extract the zip file you just downloaded in a place where you want to install flutter. Don’t select C:\Program Files folder as it requires special permissions. You can create a new folder especially for flutter development in any of your partitions. For example, C:\src\flutter
- Locate the file flutter_console.bat inside the flutter directory and start it by double-clicking on it.
Update your PATH
This is the most important step and the step where a lot of people mess up if they haven’t setup an environment variable before.
To use the flutter commands on regular command prompts you need to add a PATH variable to your machine.
- Go to “Control Panel > User Accounts > Change my environment variables”. But this is not a default for all windows. If you are having a problem locating Change my environment variables setting, just go to “Control Panel” and search environment variables.You will find an option to edit your environment variable. Click on it
- A System Properties dialog will pop up. Go to Advanced tab and click “Environment Variables”
- Under “User variables”, locate the variable named “PATH”. Don’t worry about the capital case or lower case. It must be named path.
- If the variable exists, click on edit (or just double click it) and go to the end of the line. Then append the full path to the “bin” folder in the Flutter SDK that you downloaded and extracted previously. For example, C:\src\flutter\bin
- In case if the variable does not exist, create a new variable named PATH, and set the value to be the full path to bin folder. For example, C:\src\flutter\bin
Now we have set up the environment variable for Flutter. This step ensures that we can run “flutter” command from any command prompt without going into the SDK folder and running flutter_console.bat every time. This saves a lot of time and speeds up the development manifolds.
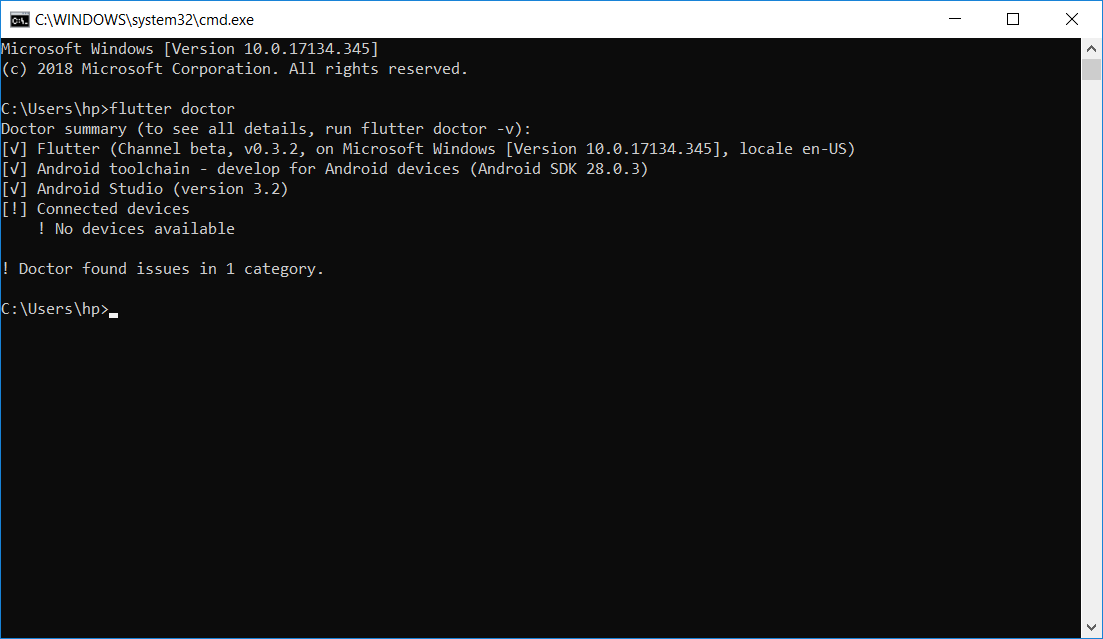
Run flutter doctor
Now that you have setup the environment variable, lets check if everything is working fine and flutter command is recognized by the command prompt.
- Search “cmd” in the start menu (without quotes) command prompt will show up. Left-click on it and it will open a command prompt window.
- Now type “flutter doctor” (without quotes) and press enter.
** To upgrade to latest flutter sdk run “flutter upgrade” (without quotes)
This will display a full report of your flutter SDK installation on your machine. The Dart SDK (DART is the official programming language for flutter) is bundled with flutter and you don’t need to install it separately.
Now, unlike me if you haven’t already setup Android Studio/Android SDK, you will most likely get an error saying that Android SDK is missing and you need to download it. Don’t worry, setting up Android SDK is a lot easier than this.
Download Android Studio here: https://developer.android.com/studio/
Once downloaded, start the setup, follow the recommended options and click on Next.
When the setup finishes, you’d have your Android Studio IDE and SDK setup automatically for android app development. We’ll configure the IDE for Flutter development in the steps below.
Now try and run “flutter doctor” on command prompt and it should work just fine. Ignore any warnings for now.
With this, we have our machine setup for flutter app development. We just need to configure the Android Studio IDE for flutter and we’ll be good to run our first app.
Setting up Android Studio for Flutter App Development
- Download and install Android Studio: https://developer.android.com/studio/ (Ignore if already installed Android Studio in previous steps)
- Start the Android Studio setup, and go through the steps mentioned in the wizard. If you don’t understand the customizations, just leave them as they are. Settings are optimized for your machine already.
- This will install the latest Android SDK, Android SDK Platform-Tools, and Android SDK Build-Tools which are required when developing a flutter app (specifically for android).
With this, you have the basic setup of Android Studio, now its time to configure it specifically for flutter app development.
- Start Android Studio.
- Go to File > Settings > Plugins
- Select Browse Repositories. Search for “flutter” plugin and click install.
- Search again for “dart” plugin and click install.
- Now restart Android Studio
These steps were easy and hopefully you don’t have any errors and your Android Studio IDE is up and ready for flutter app development.
Setup an Android Device
You can run the flutter app on an emulator as well as on a real device. I usually prefer the second option as it gives me an actual experience of what the app would look and feel like and also it is less taxing on the machine.
To setup your phone to run flutter app, follow these steps below:
- First, we need to enable Developer Options and USB Debugging. On your android phone, go to Settings > About Phone and then keep clicking on the Build Version option. Soon you’ll get a message that developer options have been enabled!!
- Now go to developer options and find the option to enable USB Debugging. Switch on/enable USB Debugging.
- Using a USB cable, plug your phone into your computer. If you get an prompt asking for authorization, authorize your computer to access the device.
- Open a terminal/command prompt and run “flutter devices” without quotes and you’ll see a list of connected devices.
Installing Flutter on Mac OS
System Requirements
To install Flutter on Mac OS, your machine must meet these minimum requirements:
- Operating System: macOS (64-bit)
- Disk Space: 700 MB (This does not include the IDE for development)
Download the Flutter SDK
- Download the Flutter SDK here: https://storage.googleapis.com/flutter_infra/releases/beta/windows/flutter_windows_v0.9.4-beta.zip
- Extract the flutter sdk in the desired location.
Go to the location where you want to unzip the SDK, then type in the command below:
$unzip ~/Downloads/flutter_macos_v0.9.4-beta.zip- Once you’re are done, you will need to add flutter tool to your path. Type in the command below:
$export PATH=`pwd`/flutter/bin:$PATH- Run flutter doctor. Type “flutter doctor” (without quotes) in the terminal and press enter. If you’ve already installed Android Studio/Android SDK then everything should work fine. But if not, then download and install android studio. It’s really easy, just like you install any other app on MacOS.
** As an Android Developer I would recommend installing android studio as it has a really great support for flutter. All you need to really do is install a plugin from File > Settings > Plugins **
Update your path (important)
In step 3 above, we setup flutter tool for that particular terminal window. But we want to be able to access it from any terminal window. To do that, you need to add a path variable to MacOS.
- Find out where you installed/unzipped Flutter SDK.
- Open (or create) $HOME/ .bash_profile.
- Add the path to flutter directory to .bash_profile file and save. To do this, enter the command below:
$export PATH=[PATH_TO_FLUTTER_GIT_DIRECTORY]/flutter/bin:$PATH- Now run “$source $HOME/.bash_profile”, to refresh your current terminal window.
- Verify that the flutter/bin directory is in your PATH by running “$echo path”
- Now that you have flutter setup, you are good to go and develop a flutter app, but you’ll need an IDE such as Android Studio or Xcode for this. Here are the links to install either one of them. Their setup is really simple and not anything unusual !!
Run Flutter Doctor
To ensure everything is working fine, open a new terminal window and run:
$flutter doctorCheck the output carefully for any errors or any additional installs that might be required to complete the installation successfully. For exapmle, if you haven’t installed Android SDK/Android Studio, it can display an Android SDK missing error.
** To upgrade to latest flutter sdk run “flutter upgrade” (without quotes)
Running your first flutter app (Both Windows and MacOS)
The process is same for both MacOS and Windows (sorry linux users :P). To create a new flutter app:
- Go to File > New Flutter Project
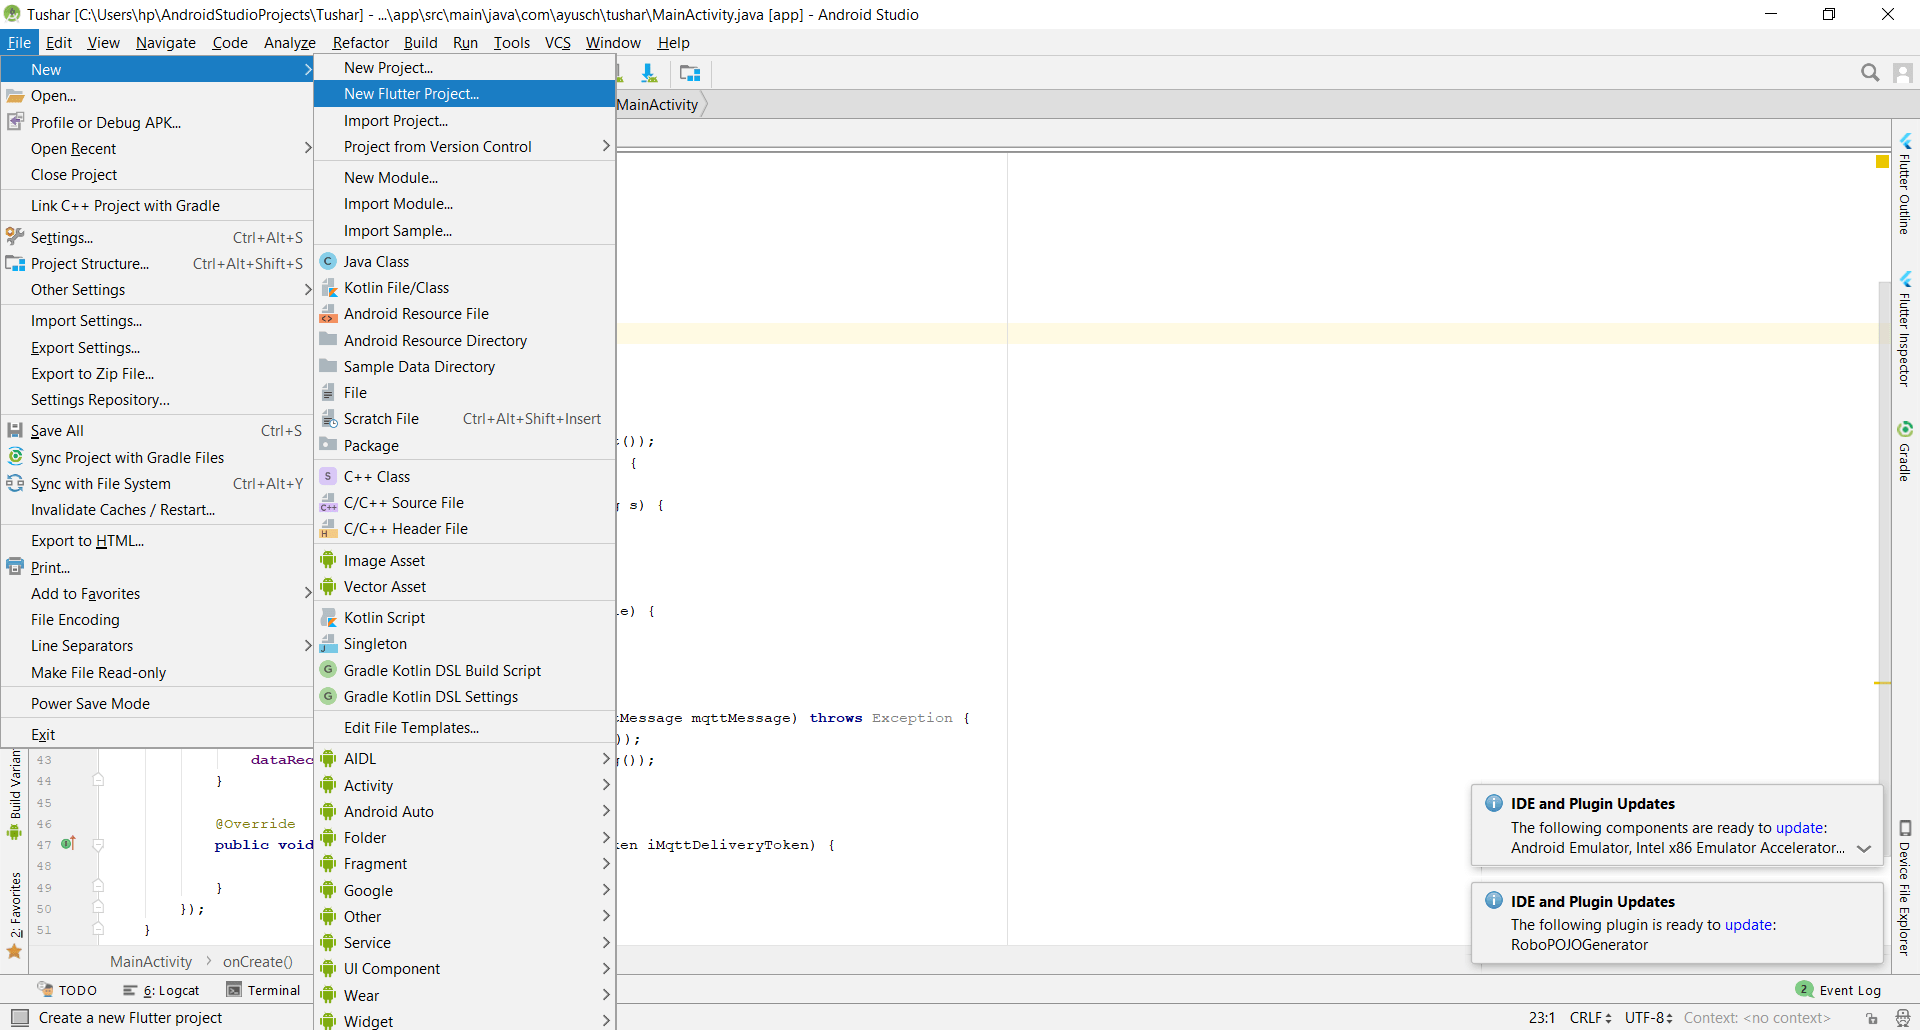
- Select New Flutter Project > Flutter Application.

- Enter project name.
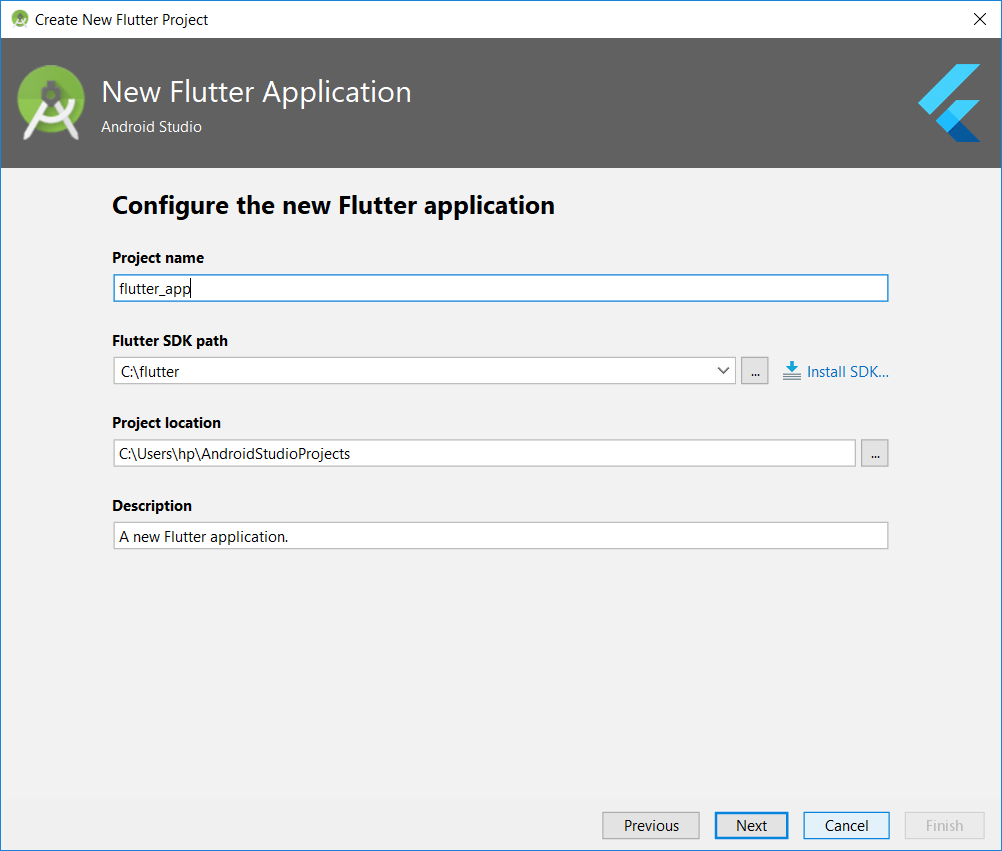
- Follow the steps ahead and click finish.
This will create a directory named myapp that contains an example flutter app for demonstration purposes.
You will find the code in lib/main.dart
To run the app, click the play button in the main toolbar and select an AVD or your phone. You will be presented with a simple screen with a counter in the center and a FAB at the bottom right corner. Clicking the FAB will update the button.
And Voilla!! You just ran your first every flutter app. Congrats!
Like what you read ? Don’t forget to share this post on Facebook, Whatsapp and LinkedIn.
You can follow me on LinkedIn, Quora, Twitter and Instagram where I answer questions related to Mobile Development, especially Android and Flutter.